Mounting a new riflescope on your rifle is a one-of-a-kind feeling. It’s a type of feeling that you can get quite often but that happiness turns into a nightmare in mere moments. When you install a riflescope and start firing a couple of shots, you will immediately see that the shots aren’t going where you are aiming.
That can happen due to misalignment and bad positioning. Leveling your scope can easily fix these issues. How to level a scope on a rifle then? Glad you asked. Let’s find that out together, shall we?
Why Level A Riflescope?
Well, you can just install a scope adjust the windage and elevation of your scope, and call it a day. While that works for most, it won’t work in extra long-range. To have accuracy on that range, you will need to level your riflescope.
Leveling a scope also ensures that you have having accurate zero and there is no artificial blending in the mixture. If you are zeroing your scope on an imbalanced scope, then you will be frustrated while adjusting.
How To Level A Riflescope The Easy Way
Steps to follow to level a riflescope:-
Step 1
Before you start the process, make sure that your rifle safety is on and you remove the magazine. Check the action chamber and remove the bolt action if possible.
When you are mounting a fresh set of scopes, it’s better to use a vise to hold your rifle in a stable position. Before you mount the scope, your rifle needs to be leveled. It’s not easy to find the flat spot on rifles, you will need to use your ingenuity to get a flat-level reading.
Step 2
Step 2 of this process is very straightforward. If you are using a set of scope rings that come in a two-part design, then install the lower part of your scope on the gun first. The bottom part of the scope ring is also known as the base.
Make sure that you don’t over-tighten the base. The torque of your scope base needs to be perfect. Make sure to use the right size and type of screw and make sure to not tighten them too much.
Step 3
Take a moment to check that the lower half of the scope ring is perfectly leveled on the gun. Take some time to make sure that they are perfect and have no misalignment.
If you are perfectly sure that everything is properly tightened and there are no issues, then you can proceed to place the top half of the rings and start tightening it if you are happy with the eye relief.
Step 4
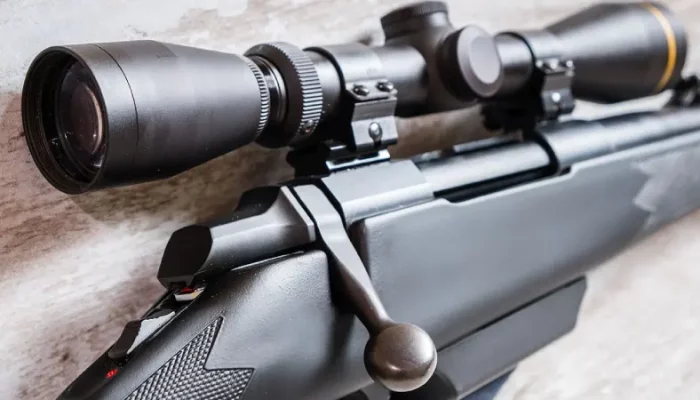
It’s finally time to level your scope. The easiest process is using a line level. Most scopes nowadays have capped turrets. And the top cap is often the elevation ring. You can use the turret cap to place the line level on. Use the line level on the turret cap at right angles to the bore of your rifle.
Carefully adjust the scope rings until the scope is leveled. Now it’s time to see if your action is leveled. If you find your action lever to be level and the scope isn’t level from end to end, then you will need to see that your scope is also leveled. As rings often come in front and rear height differently, there is a solid chance you mixed up the two.
Step 5
If you are satisfied with the rifle riflescope are level. If you are happy with the reading, now torque the screws of the top half and firmly finish the installation process. Your manufacturer has a reading of the right amount of torque. Use that manual.
Using Tools To Make The Process Easier
Segway Reticle Leveler
If you don’t want to take manual labor and want to use technology to your advantage, then you can use a Segway reticle leveler.
Step 1
Follow steps 1 and 2 of the previous methods. They are still true.
Step 2
Place the leveler on the rifle. There is a detailed description included with the package. Read that a couple of times and make sure you are following the right steps.
Place the brass bar of the reticle leveler on the base of your scope mount, right under the scope. Attach the two plastic wings that are included with the rubber band.
Step 3
There is also a bubble leveler included in the package. It’s time to take it out and use it in action. Adjust the rifle in a way the bubble level is centered, Now, look through the scope and make sure that your reticle aligns with the horizontal lines on the plastic wings of your leveler.
Step 4
If you are satisfied with the reticle and the lines on Segway wings, then you can start to tighten up the screws of your scope mount. Make sure to follow the steps provided by the manufacturer.
Conclusion
These are the two easiest ways to level a scope on a rifle. They are straightforward to follow. While you can take the help of a gunsmith or a professional agency, it’s always more fun to do something by yourself.
With that said, that’s all for now. Thanks for reading and I hope you learned something useful and valuable. I will see you on the next one.
Scopes:- 17 HMR | 17 WSM | 204 Ruger | 224 Valkyrie | 22 Magnum | 243 Winchester | 257 Weatherby | 270 Winchester | 3 Gun | 300 PRC | 338 Lapua | 350 Legend | 375 HH | 44 Magnum | 450 Bushmaster | 50 BMG | 6.5 Creedmoor | 6.5 Grendel | 6.8 SPC | 7.62.39 | Benjamin Marauder | Henry H001 | M1a | Marlin 336 | Marlin 795 | Marlin Model 60 | MK12 | Ruger Gunsite Scout | Ruger Mini 14 | Ruger Mini 30 | Savage 220 | Scar 20S | Sig 716
Hi, I’m Brent Hansford. A writer turned hunter & now sharing my love for the sport through writing. As I practically breathe weapons, I firmly believe I’m capable of providing you with new knowledge about firearms and hunting. My mission is to help more people get better at hunting & master the weapons. Let me help with unleashing the beast within you!