Removing the bolt from the gun to clean it or perhaps change/modify it is a task that we often think is too hard to do. While it’s true to some extent, with a proper guide, someone with 0 experience with guns can also handle it.
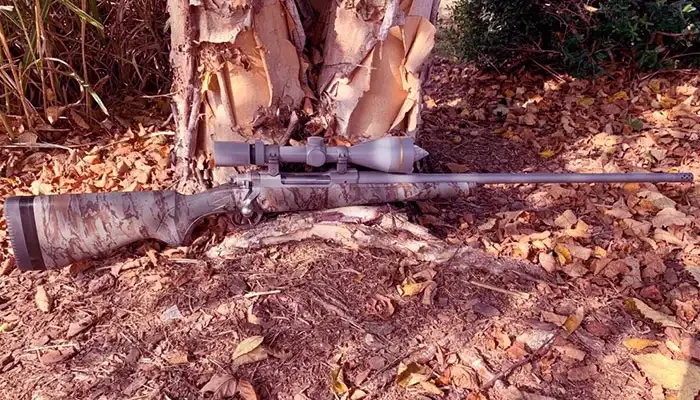
Yes, there are ways of doing the task safely without damaging any portion of the weapon. The weapon on topic here is the Remington 700. It’s a bolt-action rifle mostly used for recreational shooting and hunting. Naturally, some people think of upgrading the Remington 700 to make it competitive against modern bolt-action rifles.
If you are looking for an easy way to remove the bolt from the Remington 700 without damaging the gun, you have ventured to the right place. Don’t worry, you will be a gun opening expert in no time.
How To Remove Bolt From Remington 700 – Steps
Step 1: Point The Gun In A Safe Direction
The first step in this guide is to point the gun in a safe direction. Preferably facing a wall where no one is standing in front of it, including you. You just cannot take risks when it comes to safety.
I understand you are a veteran and you can open a gun in your sleep, but don’t play with safety. Doesn’t matter who you are, you are not above gun safety, period.
Step 2: Pointing The Barrel
Now that you ensure there is no way of the barrel pointing towards you or someone else, put the safety mechanism in the “S” position. This will disable the gun and stop the chamber from working.
It will also prevent false fire or misfire if that were the case. Even if there is no cartridge in the chamber, it’s a good idea to follow this step for both physical and mental safety.
Step 3: Don’t Touch The Trigger
While you are touching the safety mechanism, don’t touch the trigger. This is what I was referring to when I mentioned misfire and false fire above. If you are touching the trigger while moving the safety mechanism, you are at risk of misfiring.
And if it so happens that there is a bullet in the chamber, of course, it will come out. And the recoil will put you in danger. So, avoid touching the trigger at any cost. I don’t want to remind you again, but gun safety is important. Prevention is better than cure.
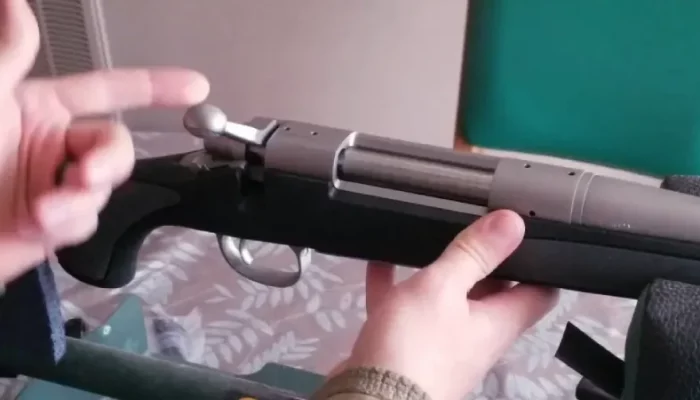
Step 4: Begin The Disassembly
Now we begin the disassembly. The first step towards disassembly is raising the bolt handle. Think of it as you are about to trigger the bolt action chamber. Raise the bolt then rotate the bolt stop counter-clockwise. Keep in mind the counter-clockwise step is applicable for Model 710 only.
After doing that, you will now need to pull the bolt handle back. By doing so, you are now removing the bolt assembly. The final task is to push the bolt stop release that you can find in the trigger guard. If you have any other model besides 700, then you might not find any trigger guard.
And that’s about it. Now you are free to pull the assembly out of the gun and do whatever you want. Whether it’s maintenance, removing rust, lubing it up, or changing it completely, you are free to do that.
Should I Upgrade The Bolt System Of Model 700?
That depends. If you are happy with the stock bolt of the Remington 700, then I don’t see any reason to upgrade. Bolt assemblies are expensive and as you noticed, it can be a bit tedious task. Albeit doable, it’s a bit annoying to any shooter.
On the contrary, you have many reasons to upgrade the bolt action of your Remington 700. The main one is anti-rust. If you have been the owner of a Remington 700 for a while now and your gun started to chip paint, then you notice there are slight rusting markings available on the bolt.
That is bound to happen sooner or later. To avoid that, you might want to go for bolt assemblies that are made out of anti-rust materials and have a coating to prevent rust as well. For example, Remington 700 LA Bolt Upgrade is available for both standard 700 and magnum 700. On top of that, it has a nitride finish that will not chip and will not catch rust, ever!
So, personally, it’s worth upgrading the bolt. But it’s not cheap. You will need to be sure that you are holding on to the Remington 700 for a long time. Otherwise, you might not find this as a worthy investment.
Things Not To Do While Changing The Bolt
There are many YouTube videos present with the title “dumb ways to die”. If you don’t want a feature on those videos, I urge you to follow gun safety rules and some advice I’m about to give below.
You are not John Wick
You don’t have a bulletproof suit made from Kevlar. You are an ordinary person like me trying to change or clean the bolt system of your gun. You need to make sure you follow the gun safety rules I mentioned above. They are a lifesaver. And I mean that quite literally.
Don’t try to put a different gun’s bolt
I see you over there. Trying to put a different bolt action assembly instead of the stock or upgraded one. Stop it. You will ruin your gun otherwise. The bolt assembly design varies from gun to gun.
If you are trying to shove in a different gun’s bolt assembly, you might be able to fit it with force, but it will not work with your weapon. If all bolt assemblies were the same, the rules of changing or upgrading wouldn’t be different based on the guns.
Conclusion
That’s about it. It’s quite easy to remove the bolt from the Remington 700 and change it to a better one if you see fit. Otherwise, you can clean it with gun-cleaning chemicals and call it a day.
While reassembling the gun, I urge you to follow the same set of safety protocols I mentioned above. I know I’m sounding like a broken record at this point, but it’s for your good.
I don’t want to see anyone get hurt accidentally while doing a simple task like this. With that said, that would be a wrap. Hopefully, you now know how to remove the bolt from your Remington 700. Till next time, take care and have fun.
Hi, I’m Brent Hansford. A writer turned hunter & now sharing my love for the sport through writing. As I practically breathe weapons, I firmly believe I’m capable of providing you with new knowledge about firearms and hunting. My mission is to help more people get better at hunting & master the weapons. Let me help with unleashing the beast within you!